플러터에서 레이아웃을 설정하는 위젯에 대해 알아보자
크게 Container, SizedBox, Row, Column, Expanded, Stack&Positioned로
총 6개정도로 나누어진다고 한다
역시 하나하나씩 알아보도록 하자(예제사진을 첨부하지 않겠음)
제일먼저 Container
코드를 살펴보면
Container(
  padding: const EdgeInsets.only(
    left: 20,
    right: 20,
  ),
  decoration: BoxDecoration(
    gradient: LinearGradient(
      colors: [
        Color.fromARGB(255, 255, 59, 98).withOpacity(0.7),
        Color.fromARGB(255, 255, 59, 98)
      ],
      begin: Alignment.topLeft,
      end: Alignment.bottomRight,
    ),
    borderRadius: BorderRadius.circular(10),
    boxShadow: [
      BoxShadow(
        color: Color.fromARGB(255, 255, 59, 98).withOpacity(0.5),
        spreadRadius: 5,
        blurRadius: 7,
        offset: Offset(0, 3), // changes position of shadow
      ),
    ],
  ),
  width: 200,
  height: 150,
  child: Center(
      child: Text(
    'Container',
    style: TextStyle(color: Colors.white),
  )),
),
이코드 같은 경우 width 200 height 150의 컨테이너가 생성되고
안에 그라디언트(decoration옵션)로 투명을 준 색깔이 컬러풀하게 빛나는 걸 확인 할 수 있다.
다음으로 SizedBox
코드로 살펴보자
Column(
    mainAxisAlignment: MainAxisAlignment.center,
    children: [
      Container(
        color: Colors.red,
        width: 100,
        height: 40,
      ),
      const SizedBox(height: 10),
      Container(
        color: Colors.blue,
        width: 100,
        height: 40,
      ),
    ],
),
특별한게 없다 각 요소 혹은 widget사이에 padding처럼 역할을 수행할 수 있는 SizedBox이다
height옵션은 높이 즉,위아래 간격으로 나눌때 width옵션은 너비, 즉 좌우로 나눌때 쓰면 된다.
다음으로 Row 와 Column
코드로 살펴보자
Row(
  mainAxisAlignment: MainAxisAlignment.center,
  children: List.generate(
    5,
    (index) => Container(
      width: 40,
      height: 40,
      color: Colors.red,
      margin: const EdgeInsets.all(5),
    ),
  ),
),
Row로 선언 이후에 LIst.generate로 5개 요소를 균등하게 만들어 주고 있다
Row는 말그대로 가로방향으로 요소를 나열하는 LayoutWidget이다
Column은 Row와 반대로 세로방향으로 요소를 나열하는 LayoutWidget이다 라고 알아두면 된다
다음으로 Expanded
역시 코드로 살펴보자
Row(
  mainAxisAlignment: MainAxisAlignment.spaceEvenly,
  children: [
    Expanded(
      child: Container(
        height: 40,
        color: Colors.red,
        margin: const EdgeInsets.all(5),
      ),
    ),
    ...List.generate(
      4,
      (index) => Container(
        width: 40,
        height: 40,
        color: Colors.red,
        margin: const EdgeInsets.all(5),
      ),
    ),
  ],
),
Row & Column을 사용할때 많이 합쳐서 사용한다고 한다
Expanded뜻은 확장하다라는 뜻인데 그냥 Row로 선언한 요소의 경우 딱 그 필요한 width만 차지하는 반면
Expanded는 가로영역 전체를 다 차지하게 된다.
CSS에서 존재하는 Flex옵션도 있는데 비율로 자리를 차지하는 옵션이다.
코드는 다음과 같다
Row(
  mainAxisAlignment: MainAxisAlignment.spaceEvenly,
  children: [
    Expanded(
      flex: 1, // 1
      child: Container(
        height: 40,
        color: Colors.red,
        margin: const EdgeInsets.all(5),
      ),
    ),
    Expanded(
      flex: 3, // 2
      child: Container(
        height: 40,
        color: Colors.red,
        margin: const EdgeInsets.all(5),
      ),
    ),
    Expanded(
      flex: 2, // 1
      child: Container(
        height: 40,
        color: Colors.red,
        margin: const EdgeInsets.all(5),
      ),
    ),
  ],
),
마지막으로 Stack&Positioned
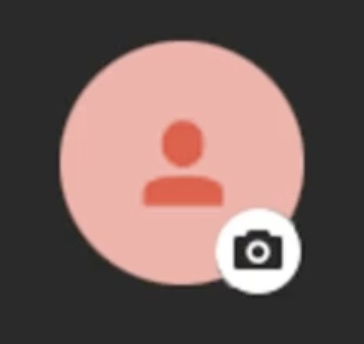
사진으로 간단하게 살펴보면 아래 사진과 같이 프로필 밑에 사진버튼같은걸 더할때 Stack을 사용하게 된다.

코드로 살펴보자
Stack(
  children: [
    const CircleAvatar(
      radius: 50,
      child: Icon(
        Icons.person,
        size: 40,
      ),
    ),
    Positioned(
      bottom: 0,
      right: 0,
      child: Container(
        padding: const EdgeInsets.all(7),
        decoration: const BoxDecoration(
            shape: BoxShape.circle, color: Colors.white),
        child: const Icon(
          Icons.camera_enhance,
          size: 24,
        ),
      ),
    )
  ],
),
Stack을 선언하고 아래 children으로 CircleAvatar과 그 위에 띄워지는 Positioned로 선언된 카메라 아이콘이 있다
Bottom, Right 옵션을 주면 우하단에 Stack이 위치하게 되며
Top, Left 옵션을 주게되면 좌상단에 Stack이 위치한다
이렇게 LayoutWidget의 종류를 알아보았다.
PageView와 함께 사용하면 여러가지 레이아웃을 만들수 있을거같다.
'Programming > Flutter' 카테고리의 다른 글
| [내일배움] Dart 기초 - 1 (1) | 2024.10.28 |
|---|---|
| [내일배움] 플러터 url 외부 연결 (0) | 2024.10.23 |
| [내일배움] 플러터 GetX 상태관리 라이브러리 (3) | 2024.10.23 |
| [내일배움] 플러터 뷰위젯(viewWidget) 종류 (1) | 2024.10.22 |
| [내일배움] 스파르타 플러터앱창업 5기 시작 (2) | 2024.10.22 |