플러터에는 View Widget으로 크게 4종류가 있다
PageView, ListView, GridView, TapbarView,
하나하나씩 살펴보자
PageView는 아래 사진과 같이 슬라이드 형식으로 애니매이션이 들어가 있는 뷰이다

코드로 예제를 살펴보면 다음과 같이 나타낼수 있다.
import 'package:flutter/material.dart';

void main() {
  runApp(const MyApp());
}

class MyApp extends StatelessWidget {
  const MyApp({super.key});

  @override
  Widget build(BuildContext context) {
    return MaterialApp(
      debugShowCheckedModeBanner: false,
      home: Scaffold(
        body: PageView(
        children: [
          Container(
            color: Colors.red,
            child: const Center(
              child: Text(
                "1",
                style: TextStyle(fontSize: 50, color: Colors.white),
              ),
            ),
          ),
          Container(
            color: Colors.blue,
            child: const Center(
              child: Text(
                "2",
                style: TextStyle(fontSize: 50, color: Colors.white),
              ),
            ),
          ),
          Container(
            color: Colors.yellow,
            child: const Center(
              child: Text(
                "3",
                style: TextStyle(fontSize: 50, color: Colors.white),
              ),
            ),
          ),
        ],
      )),
    );
  }
}
Body안에 PageView를 생성하고 children으로 요소를 설정해 주면 저 위에 사진처럼 동작하는 View를 만들 수 있다,
다양한 옵션은 덤, 여러 유용한 옵션이 있으니 구글에 찾아볼 수 있도록 하자
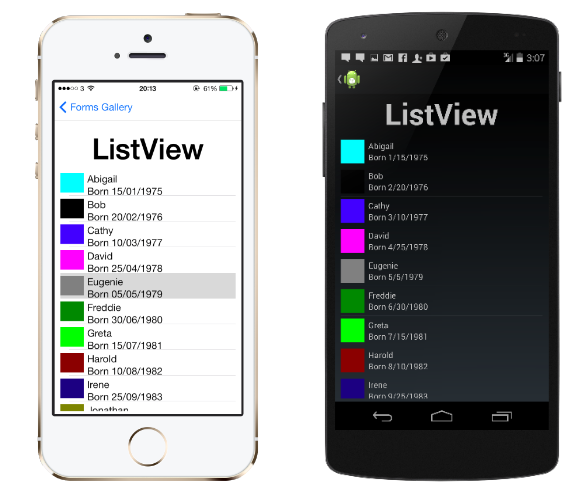
ListView같은 경우에는 아래 사진과 같이 말그대로 여러 리스트를 한페이지에서 보여주는 View라고 할 수 있다

샘플코드는 다음과 같다
Body에서 ListViewf를 설정해주고 똑같이 children으로 요소를 받아서 프린트 하는 식이다
import 'package:flutter/material.dart';

void main() {
  runApp(const MyApp());
}

class MyApp extends StatelessWidget {
  const MyApp({super.key});

  @override
  Widget build(BuildContext context) {
    return MaterialApp(
      debugShowCheckedModeBanner: false,
      home: Scaffold(
        body: ListView(
          scrollDirection: Axis.horizontal,
          children: List.generate(
            10,
            (index) => Container(
              width: 100,
              height: 100,
              margin: const EdgeInsets.all(5),
              color: Colors.red.withAlpha((index + 1) * 25),
            ),
          ),
        ),
      ),
    );
  }
}
유용한 옵션중 하나인 reverse는 true로 주게 되면 제일 첫번째 요소가 axis의 제일 마지막에 위치하게 된다
또한 Physics옵션도 있는데 컨트롤러를 연결하고 사용하면 된다고 한다
다음으로는 GridView 이다
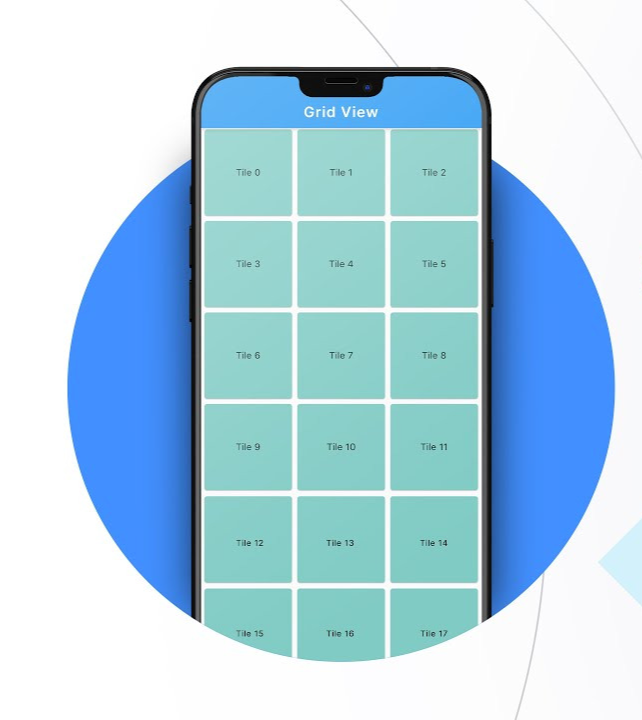
GridView는 다음과 같이 N * N 의 요소를 표현할때 사용하면 좋다

코드로는 아래와 같이 역시 GridView로 정의 하고 사용하는 모습을 볼수 있다.
주의 해야할 점은 gridDelegate: const SliverGridDelegateWithFixedCrossAxisCount 옵션을 필수로 들어가야 하고
crossAxisCount가 그 축에서 나타낼 요소의 수를 나타낸다고 보면 된다. 나머지 옵션은 spacing, 즉 얼마나 띄어서 요소를 나타낼건지
결정한다고 보면 된다.
import 'package:flutter/material.dart';

void main() {
  runApp(const MyApp());
}

class MyApp extends StatelessWidget {
  const MyApp({super.key});

  @override
  Widget build(BuildContext context) {
    return  MaterialApp(
      debugShowCheckedModeBanner: false,
      home: Scaffold(
        body: GridView(
          gridDelegate: const SliverGridDelegateWithFixedCrossAxisCount(
            crossAxisCount: 3,
            mainAxisSpacing: 2,
            crossAxisSpacing: 2,
          ),
          children: List.generate(
            100,
            (index) => Center(
              child: Container(
                color: Colors.grey,
                child: Center(child: Text(index.toString())),
              ),
            ),
          ),
        ),
      ),
    );
  }
}
또한 다른 옵션도 있는데 아래와 같ㅌ이 옵션을 주게 되면
각 요소가 최대 얼마나 길이를 가지고 있을수 있는지 정해주는 옵션이다.
          gridDelegate: const SliverGridDelegateWithMaxCrossAxisExtent(
            maxCrossAxisExtent: 300,
            mainAxisSpacing: 2,
            crossAxisSpacing: 2,
          ),
마지막 요소인 TabBarView 이다
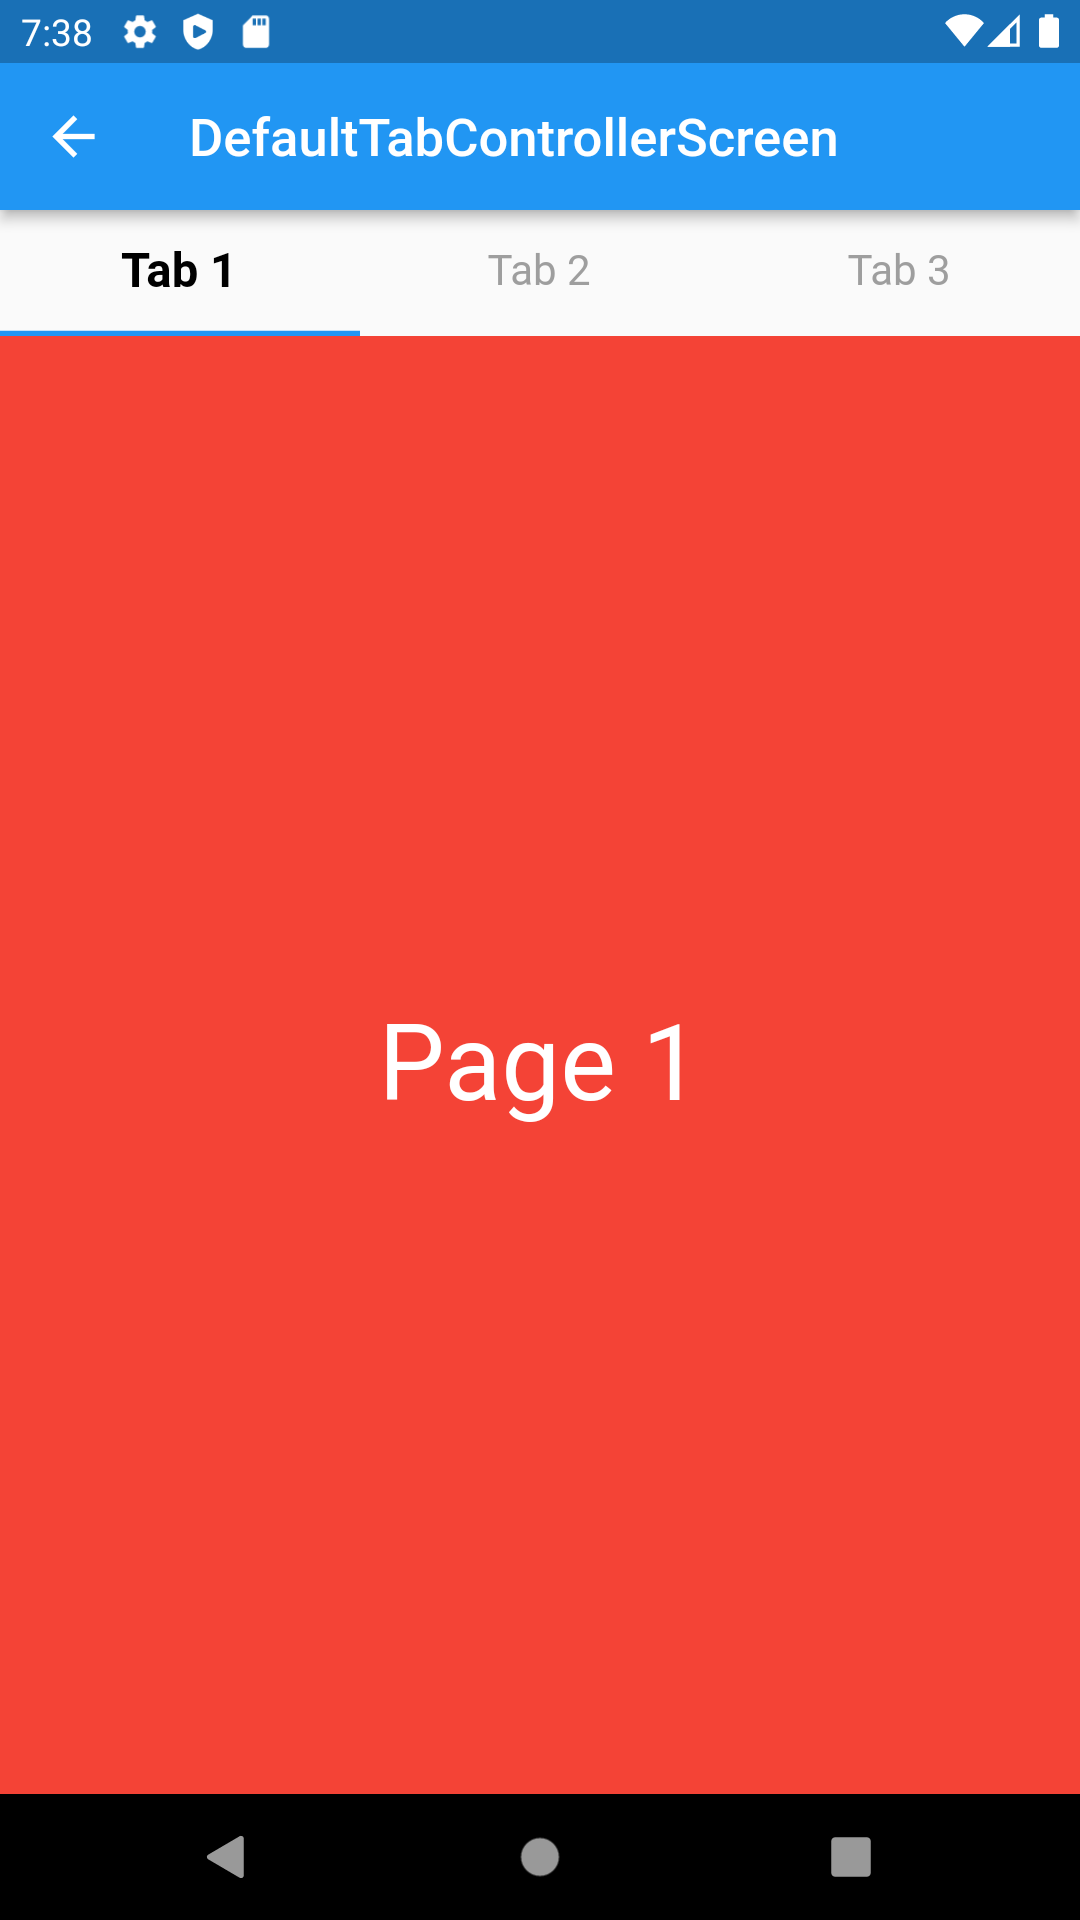
말그대로 상단 혹은 하단에 위치하면서 다른 탭을 나타낼때 사용하면 된다.

TabBarView는 다른 View와는 다르게 2가지 요소로 구성이 되는데
말 그대로 Tab을 나타내는 요소와 Body를 나타내는 요소 2가지로 나누어지게 된다.
코드를 살펴보자
import 'package:flutter/cupertino.dart';
import 'package:flutter/material.dart';

void main() {
  runApp(const MyApp());
}

class MyApp extends StatelessWidget {
  const MyApp({super.key});

  @override
  Widget build(BuildContext context) {
    return MaterialApp(
      debugShowCheckedModeBanner: false,
      home: Scaffold(body: const SampleWidget()),
    );
  }
}

class SampleWidget extends StatefulWidget {
  const SampleWidget({super.key});

  @override
  State<SampleWidget> createState() => _SampleWidgetState();
}

class _SampleWidgetState extends State<SampleWidget>
    with TickerProviderStateMixin {
  late TabController _tabController;

  @override
  void initState() {
    super.initState();
    _tabController = TabController(
      length: 3,
      vsync: this,
    );
  }

  @override
  Widget build(BuildContext context) {
    return Scaffold(
      body: Column(
        children: [
          TabBar(
            controller: _tabController,
            labelColor: Colors.blue,
            unselectedLabelColor: Colors.grey,
            labelPadding: const EdgeInsets.symmetric(vertical: 20),
            tabs: const [
              Text('메뉴1'),
              Text('메뉴2'),
              Text('메뉴3'),
            ],
          ),
          Expanded(
            child: TabBarView(
              controller: _tabController,
              children: [
                Container(
                  color: Colors.blue,
                  child: Center(child: Text('메뉴1 페이지 ')),
                ),
                Container(
                  color: Colors.blue,
                  child: Center(child: Text('메뉴2 페이지 ')),
                ),
                Container(
                  color: Colors.blue,
                  child: Center(child: Text('메뉴3 페이지 ')),
                ),
              ],
            ),
          ),
        ],
      ),
    );
  }
}
양이 좀 많지만 어렵지 않다.
SampleWidget은 StatefulWidget을 상속받아 State를 유지하게 된다.
그리고 컨트롤러가 중요하다! TabController를 late로 선언하고 initState()에서 초기화 해야 한다
vsync는 this를 사용하기 위해 with TickerProviderStateMixin을 같이 선언해준다
(with ~는 animation을 사용할 경우 항상 사용해야 한다고 한다[싱크맞추기위해])
Tabbar의 메뉴개수와 아래 body에서 페이지 개수는 같아야한다, 다르면 오류가 난다
Body는 Contoller를 반드시 넣어줘야 한다는걸 잊지말자
페이지를 나타낼때는 Expanded로 선ㅇ넌하고 아래 컨트롤러를 정하고 내용을 넣어주면 된다
Tab은 아래와 같이 옵션을 정할수 있다
TabBar(
  controller: _tabController,
  labelColor: Colors.blue,
  unselectedLabelColor: Colors.grey,
  labelPadding: const EdgeInsets.symmetric(vertical: 20),
  tabs: const [
    Text('메뉴1'),
    Text('메뉴2'),
    Text('메뉴3'),
  ],
),
'Programming > Flutter' 카테고리의 다른 글
| [내일배움] Dart 기초 - 1 (1) | 2024.10.28 |
|---|---|
| [내일배움] 플러터 url 외부 연결 (0) | 2024.10.23 |
| [내일배움] 플러터 GetX 상태관리 라이브러리 (3) | 2024.10.23 |
| [내일배움] 레이아웃위젯(LayoutWidget) 종류 (1) | 2024.10.22 |
| [내일배움] 스파르타 플러터앱창업 5기 시작 (2) | 2024.10.22 |